painting progress

More colours go on and the lion is starting to take on some life.

I should note that the painting was a bit all over the place. Zoe got excited and started going ahead painting the details in before she got the base colours right. There’s a few bits which you can see which look quite messy, where she’s painted over sections roughly in prepartion to fix it up afterwards.

Note along the cheek, zoe had initially painted in the black spikes but painted over it to get the base blue colour right

By this stage, Zoe had decided that she would put the detailing in a bit later and get the colours right so you’ll see certain sections like the black swirls around the nose and the spikes along the top lip with unclean lines. 


We had to improvise for the bit on the side of the eye. We ended up with a simple stripe pattern.
Front shot with cleaner lines.


Step 22 and so the painting begins

I thought I’d use this post to thank my girlfriend Zoe for volunteering to do the painting.
It’s probably better that she does it because she’s much more of a perfectionist so I know that the lion will come out much better than anything I could have produced.
My little contribution was to sketch on the lion all the patterns and to explain to her what needs to be painted what colours and to orientate her to the various screenshots I have taken. My other little contribution was to paint the ears so I can say that at least I painted a part of the lion myself =D

Check it out
This was my contribution with the painting. I suspect Zoe will repaint it. She thinks I did a rushed job and my lines aren’t clean enough. 
And now back to Zoe’s painting
The left and right eyes are different. She was experimenting with shading and blends

Zoe thought it would be cool to have an aqua nose. 
I got her to change it back to green. 

Keep your eyes peeled for more to come

Step 20 part 2- sketching the design

Ok, so managing to get screenshots of lion head is one thing, translating that into clean lines and a design with definite colours is another.
I managed to work out a fair bit of the design but I had to make up certain bits.
I’m glad that this lion had bristle fur so that I could appreciate the painting.

My sketches on paper
Sketches on the lion

Progress report .. from then til now 18 months later. Here’s a snapshot

Before I start posting up pictures of the painting process, I thought I’d post a couple of pictures from whence I started to where I am now. So far, it has probably taken me about 18 months of slow, tedious, painstakingly boring work, with many breaks in between followed by very short periods of inspiration and a bit of an ass kicking by my girlfriend to get the job done.

Step 21 the pom poms

So I wasn’t sure if there was any way I could get out of paying for pom poms because they are quite expensive items. Making them was probably not an option because I didn’t have silk and the woollen pompoms I have seen were generally quite cheap looking.
My hope was that I could get them cheaply from China through my kung fu senior but that was put on hold as I couldn’t get there during my last trip to Hong Kong
But its amazing what you can find on the internet and all the helpful tips that people offer. I had found a guy on the internet who had made his own pom poms using woollen yarn and actually turned them into nice fluffy spheres that are most worthy of being adorned on a lion. The colours were vibrant and they looked full.
So I decided that the worst that could happen if I tried it myself is that I lose a couple of dollars.

Check them out for yourself, I’m quite pleased with the result. The trick is to get a very fine dog fur brush. I had used a much coarser one earlier which didn’t do much by way of fluffing.

Wrapping the wool around your cardboard circles. Google it up or youtube this process

Snip between the edges and you end up with a “pom pom”. I wrapped the wool about 12 layers deep for the big pom poms. The more layers there are the thicker and fuller your pom poms. For the smaller ones, I did about 8-10 layers.
They don’t look like the beautiful silk ones yet but you’re on the right track.

He’s the next important bit. Invest yourself in one of these puppies!! These dog fluffers are amazing. Just start brushing away. Remember to seperate the colours as you’re frizzing it up so you can keep the nice layers of colour.

What the pompoms look like after you’ve fluffed them. They should be quite fuzzy and probably a bit pear shaped. You can see a huge different between this and the one in the background which has not been fluffed yet. 

When you’re done fluffing, get yourself a pair of scissors and start trimming it into shape until it looks spherical. 

I made a whole bunch of smaller ones to boot
My semi final collection. I need to make another 10 more but I’m a bit over wrapping wool around pieces of cardboard. Onto painting!

the paint


Getting the paint was another interesting story.
I was in the process of getting the same branded paint that I had used for my previous project- water based enamel paint by a brand called Splashes because of the glossy look and the different colours they had on offer. Only problem was that they cost between $9aud- $12aud at the hardware store and for this lion, I would probably need at least 6 different cans for all the colours that I needed to paint.
So at the check out counter, the gentleman ahead of me asks if I was seriously going to buy the paint. I said yes, from which he tells me off saying that I was young and stupid for wasting my money. He then advises me that the best and cheapest way to get paint is to go to the paint section of the hardware store and look for their sample pots of paint.
So I wander over there and low and behold, there are about 100 pots of unwanted paint sitting there on sale a $2 a pot. The only catch is that you have to open every single one of them to check out what colour is lurking beneath which was a fun exercise in itself.
In the end, I bought about 20 pots of paint ranging between 1-2 dollars a pot and ended up ordering a sample pot of yellow for 10 dollars to complete the colour spectrum.
I saved about 50 dollars in the whole process and have an extra 15 pots of paint (which means more colours) that I could use for other projects.


Oh but I should mention, the paint is house paint so it isn’t glossy. I was just going to cover the whole head with a glossy sealer to make it waterproof and get the shiney look.


Moral of the story, GET SAMPLE POTS!!!

The rest of the paint

Step 20 the design pattern

Making and painting this lion head has given me a much much much greater appreciation about the artisans that make lion heads currently, but especially the artists that made them in the past. The amount of details and complex painting that went into the lion heads of old is enough to do my head in!!!
I have literally spent hours and hours watching the lion dance scene of the movie Lion Vs Lion over and over and over again trying to work out the paint job of all the various parts of the lion. In the end I managed to screen shot as many bits as I can but am still short on a couple of parts of the lion which I’ll need to rely on my imagination to complete.
I’ll emphasize it again, it ceases to amaze me how much work and dedication would have gone into making these lion heads. I can understand now why the teams in the past would only bring out one lion head when they went out to perform. Any more that one would be a disservice to each lion head not getting the full attention it deserves.

These are some of the screen shots I managed to capture. Hopefully, you can make out some of the detailing that has gone in. There was a lot of squinting eyes to make out all the fine detail.

Step 19 the tail

I’ll preface this post by thanking my kung fu senior Pan for his help in getting me this tail!
Getting the tail was not really the next step on my to-do-list but none-the-less, it was the next step forward in my lion coming together. And it was quite funny how I came to have the tail.

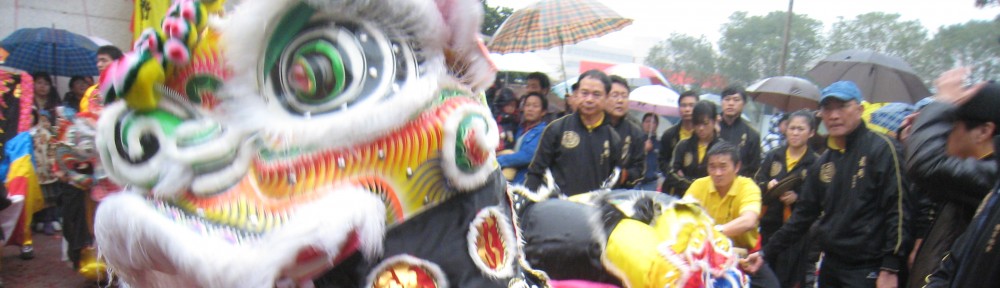
During the last month, I managed to get away from Sydney and travel to Vietnam and Hong Kong.

I knew that Vietnam was the place to get very cheap (pricewise) lion heads and so potentially lion head parts. I ended up wandering around Cholon (in Saigon) and stumbling upon a few lion head shops that sold lions and dragons to…… funnily enough… a couple of the kung fu schools that are running in my area. However, the style of lions that they made were the new fluffy lions with short tails and lots of sequins. Not really what I was after and to top off my dejection and not finding what I wanted that said it would be difficult for them to make a long multicoloured tail due to lack of materials. Everything else they had on offer by way of pom poms and fur was just not available. Not to discredit the lions that they made, but they just didn’t have what I was after.

However, I had plan B….. Hong Kong. I had contacted one of my kung fu seniors in Hong Kong beforehand to see if he could help me get some lion head parts for my lion. He said that if I managed to get a Chinese visa in time, he would take me into Canton to where some of the lion manufacturers are so I could tell them and see for myself what they have on offer. I was so excited about the prospect of seeing for myself some of the pros in action but unfortunately, the cost of making a Chinese visa at such short notice would have cost me a lion head in itself!!!
Again I felt bitterly disappointed and not getting the supplies that I wanted.
That’s when my senior said, oh by the way, I have a tail that I managed to salvage from one of the old lion heads that they were throwing away at the school that I work at. You can look at it and throw it out if you dont want it. It’s tattered and not in the best condition…………………..

This is the tail that he showed me. =D =D =D =D EXACTLY what I was after in such good condition. Almost all the bells are still attached, all the metallic discs are still there, there are no rips in the fabric, the colours are still vibrant, there’s a “sausage” spine the stretches through it.

Step 18 starts becoming a blur

Its been a while since my last post and a lot has happened since then!
It has been getting really exciting for me now especially as the lion is starting to look like the finished product and I have been stretching my brain and resources to try to tie up the rest of the ends together. It’s funny that I say that because so far, only half the work has been done and the next few steps will be the uphill battle.
The next few steps that I need to do have all gone on simultaneously.

These include –
1. sketching out the design of the lion and getting the patterns right
2. getting the paint and the colours right to start painting
3. getting all the other bits that complete the lion- the fur, the pom poms, the eyes, the beard, the tail


Step 17 and the papering begins!

It’s been a long time since my last post.
I’ve been busily papering my lion and the more I add on layers and see the lion come into fruitition, the more excited that I get.
In the end, I’ve used 3 layers of calligraphy paper and the initial one layer of netting.
So far it feels strong and solid. The shape of the lion is more than I can imagine.
I got a bit excited while I started papering and decided to go and get me some paint!!

Before I finished, my girlfriend also got a bit excited and started painting the top lip.